 EN
EN
So What Exactly Is Sublimation, and Why Should You Care?
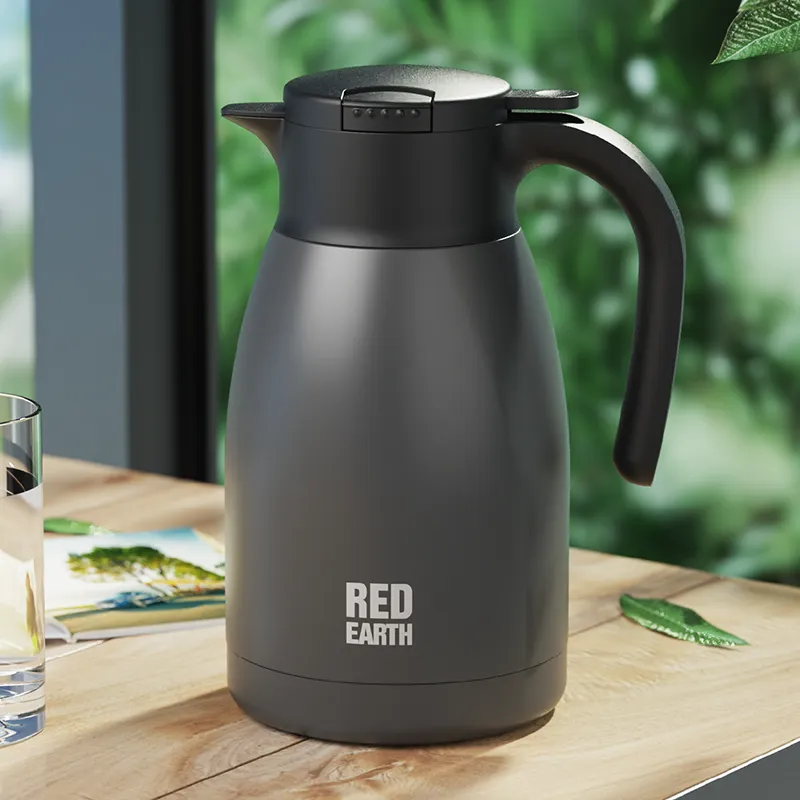
Alright, let's break this down in plain English. Sublimation printing on a water bottle insulated with a stainless steel body isn't some fancy magic trick – it's science, but the kind that actually makes sense. Here's what happens: we take a special dye, turn it into a gas using heat and pressure, and that gas literally sinks into the polyester coating on the tumbler. It doesn't sit on top like a sticker or a screen print. It becomes part of the surface. That's why when someone asks us at Gint how long their logo's gonna last, we tell them – as long as the bottle lasts. No peeling, no cracking, no fading after a thousand trips through the dishwasher. The trick is, it only works on tumblers that have that specific polyester coating baked on. Bare metal? Won't take it. So if a supplier tells you they can sublimate on raw stainless, they're either misinformed or selling you something else.
The Sweet Spot – Temperature, Pressure, and Timing
Getting sublimation right is like baking a good cake – you need the right heat, the right pressure, and you can't walk away from it. Our go-to settings at the shop are 365°F, about 40 psi, and we hold it for 60 seconds. That's the golden zone. Too hot and the coating might yellow or warp. Too cold and the dye doesn't fully gas out, so your logo comes out looking washed out and sad. We've run thousands of tests over the years, and those numbers consistently give us the sharpest images, the richest colors, and the most durable bond. It's not guesswork – it's what works. And when a customer sends us a complex design with gradients or tiny text, we know we can hit it clean because we've dialed in that process down to the second.
What You Need to Get Started – Gear That Actually Pays Off
If you're thinking about setting up your own sublimation line for water bottle insulated products, you don't need to break the bank on day one. The core setup is pretty straightforward: a sublimation printer (we use Sawgrass for smaller runs and Epson conversions for bigger ones), dye-sublimation inks that are formulated for this specific process, and high-release transfer paper that lets go of the dye cleanly. Then you wrap your printed design around the tumbler with heat-resistant tape – gotta get that wrap tight and straight, or you'll end up with a ghosted seam – and into the press it goes. For runs under 2,500 units, a single-tumbler press works fine if you've got good workflow. But when orders start hitting 10,000 or more, you're gonna want a multi-tumbler press or a conveyor oven. Those machines let us cure dozens at a time, keeping our per-unit cost down and our shipping dates honest. One thing we learned the hard way? Synchronize your printer output with your oven speed. If one outruns the other, you've got either a pile of unprinted wraps or an oven sitting idle – both cost you money.
The Other Guys – Laser Engraving and UV Printing
Now, sublimation isn't the only game in town. Depending on what your brand needs, laser engraving and UV printing have their own strong suits – and their own compromises. Let's run through 'em.
Laser Engraving – Permanent, But No Color
Laser engraving is a beast when it comes to durability. It basically vaporizes the coating off the water bottle insulated surface to expose the bare metal underneath, leaving a clean, permanent mark. Promo Testing Lab ran 500 commercial dishwasher cycles on laser-etched tumblers and the logos were still perfectly readable. That's tough to beat. The downside? It's monochrome – usually silver on whatever color your bottle is. So if your brand lives in full-color glory, laser's not gonna do it for you. It's also a higher upfront investment for the equipment, but per-unit costs drop to almost nothing at volume. We use it for customers who want that premium, minimalist look – think high-end corporate gifts or luxury hotel amenities.
UV Printing – Full Color, Faster Turnaround
UV printing is the new kid that's been making moves. It sprays micro-droplets of ink onto the tumbler and cures 'em instantly with UV light. Recent advances in plasma pre-treatment have made adhesion way better – we're seeing 5B ratings on ASTM D3359 cross-cut tests, which means the ink really sticks. You can get photorealistic images, gradients, tiny text – all in full color. It works on bare stainless too, which is a plus. But here's the trade-off: it's not as bulletproof as sublimation or laser over the long haul. After enough abrasion, that ink layer can wear down. So for short-run promotional stuff or limited editions? UV is fantastic. For something that's gonna get tossed in a backpack and used daily for years? We still lean sublimation.
| Method | Color Range | Durability | Best For | Surface Requirement |
|---|---|---|---|---|
| Sublimation | Full color, photo-grade | Excellent – dye becomes part of coating | Long-term brand use, high-detail logos | Pre-coated polyester surface needed |
| Laser Engraving | Monochrome (silver on color) | Outstanding – permanent physical mark | Premium, minimalist designs, high-volume | Powder-coated or painted surfaces |
| UV Printing | Full color, photorealistic | Good – improves with plasma treatment | Short-run, fast turnaround, bare stainless okay | Works on most surfaces with pre-treatment |
Let's Talk Bulk Orders – What It Actually Costs
If you're ordering in volume, the numbers start to look real different. Setup fees, per-unit costs, lead times – they all shift depending on how many you're running. Here's a rough breakdown based on what we see coming through Gint for a standard 20 oz tumbler with one full-color sublimated logo.
| Order Size | MOQ | Typical Setup Fee (USD) | Per-Unit Cost (USD) | Lead Time (Days) |
|---|---|---|---|---|
| Small | 500 | $400 – $600 | $4.50 – $5.50 | 25 – 30 |
| Medium | 2,500 | $0 – $200 | $3.20 – $4.00 | 20 – 25 |
| Large | 10,000 | $0 (waived) | $2.50 – $3.00 | 15 – 20 |
The setup fees cover things like mold fabrication if needed, screen prep, or digital file validation. At higher volumes, those costs get diluted or waived entirely. Lead times shrink too, because we can dedicate more press time to a single run without switching over. The key takeaway? Plan ahead, order early, and don't wait until the last minute if you want the best pricing and the earliest delivery.
Getting Your Artwork Right – The Stuff Nobody Tells You
Here's where a lot of orders go sideways. You'd be surprised how many people send us a logo that's low-res or the wrong color mode and expect perfection. For sublimation on a water bottle insulated, we need vector files – AI, EPS, or SVG – with all text outlined and the color set to CMYK. If your design has gradients or photos, they need to be embedded at 300 dpi. And that wrap-around template? It has to match the exact circumference of the tumbler – usually around 260 mm – plus a 3 to 5 mm bleed. If the template's off, the seam where the design meets itself will look wonky. Surface finish is another thing. If your tumbler has a powder coat or a gradient finish, sublimation takes beautifully. But if it's bare stainless, we need to apply a polyester coating first – and that adds cost and time. Always ask for a physical prototype before we run the full order. It's a small investment that saves a lot of headache.
A Quick Story From the Shop Floor
Last year we had a customer come in with a super intricate design – full-color gradient, tiny text, the works. They wanted 8,000 units delivered in four weeks. On paper, it looked tight. We ran a prototype, adjusted the template by a few millimeters because their artwork wasn't quite wrapping right, and dialed in the press settings to account for the specific coating batch. The final run came out clean – every single tumbler matched the prototype. That customer still orders from us every season because we caught the issues early and communicated clearly. That's the thing about this business – it's not just about having the right machines. It's about knowing the little details that turn a good print into a great one.
What We Tell Brands Before They Commit
If you're a brand looking to put your logo on a water bottle insulated for resale or promo, here's our honest advice. Figure out your volume first. Then decide on your design complexity – are you going for full-color photo vibes, or a minimalist monochrome mark? That'll point you toward sublimation, laser, or UV. Don't chase the cheapest quote; chase the one that understands your material, your timeline, and your quality standards. Ask about their prototype process. Ask about their coating supplier. Ask what happens if a batch doesn't pass quality check. A good manufacturer will have straight answers for all of that. And if they don't? That's a red flag.
So, Is Sublimation Worth It?
Bottom line – for full-color, durable, dishwasher-safe logos on a stainless steel water bottle insulated, sublimation is still the best bet we've found. It's not the cheapest method upfront, and it requires the right coating and the right equipment. But when you factor in the lifespan of the print – years of daily use without fading or peeling – the value is hard to argue with. Laser engraving has its place for that sleek, permanent look. UV printing is great for quick-turn, photorealistic projects. But if you want your brand colors to pop and stay that way, sublimation delivers. It's what we recommend to most of our bigger clients, and it's what we keep investing in on our own production floor.
At RedEarth, we've run enough sublimation jobs to know what works and what doesn't. Through our partnership with Gint's production team, we've fine-tuned every step – from coating application to press calibration – so that every logo comes out sharp, vibrant, and built to last. Whether you're ordering 500 or 50,000, we treat each run like it's our own brand on the line.